Ribbit
 Monday, September 22nd, 2008
How cute are these? They are so easy to make too! I have the feeling Maddox is going to have some great birthday parties! By the way he turns 1 week old today. He is growing up so fast.Â

Monday, September 22nd, 2008
How cute are these? They are so easy to make too! I have the feeling Maddox is going to have some great birthday parties! By the way he turns 1 week old today. He is growing up so fast.Â
Tuesday, September 9th, 2008
Tuesday, September 9th, 2008
I decided to take some time off from knitting the baby blanket and make our baby-to-be a little hat. I have made some version of the angora baby hat for several friends, therefore it seemed almost a requirement that my baby have one upon birth as well. This one knit up super fast. I worked on it in two sittings, last night and this afternoon – and now its done! Easy peasy. It is a simple K2, P2 rib with some decreasing at the crown. I think I might make matching booties as well.

Wednesday, September 3rd, 2008
Tuesday, September 2nd, 2008
I decided to make these blocks for the baby. I saw the video tutorial on Martha Stewart Crafts and I was hooked. They are so cute for how easy they are to make.

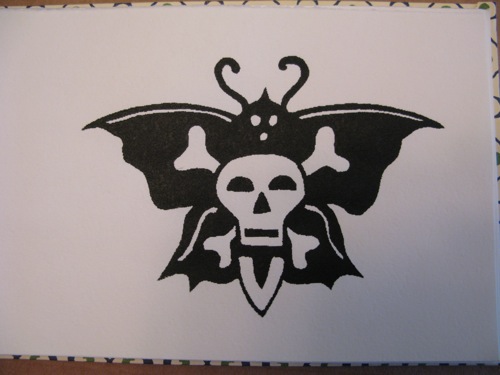
My supplies just arrived via USPS (as I was rummaging through things looking for something that needed a butterfly with skull and cross bones). So I’ll make ’em up and show you all when they are completed!
Tuesday, September 2nd, 2008
Well, I got cocky, and I paid for it. I painted my design on the screen, let it dry for a day. Then today I was ready to print! I did some testers. Then deciding they were perfect, printed a page of paper in book I made, and then a print on an old tote bag. Again, both looked great. Here they are…
Tote:

And at that point I washed the ink from the screen and let it dry. The thought was I’d wait until Dallas was home to help me hold the screen on the white onesie. This would ensure a most decent print. Well the screen dried, and I got antsy. (You have to know that I’m not sure what to do with myself these days. I feel like I’m just waiting for this baby. There isn’t much I have the energy for, so I’m getting a little stir crazy.) I figured the tote turned out just fine, how hard could a onesie be. I was sick of waiting and wanted to get the show on the road. After all, I had a blog post that needed to be written.
I’m not exactly sure how it all happened, but I had ink in places there shouldn’t be ink. It was smeared down below the image and between the antennae. I tried to wash the ink from only those places, but the fabric wicked up the water and began to saturate and smear the design – which was actually quite fine to begin with. So the back and forth began, of cleaning up one mess and making another part worse. Eventually I decided to just try to wash out the whole thing and see if I could begin again, but no. So now I have a faded design on a pretty clean background. All in all, I think it could have ended worse. Now I just like to think it looks worn in, in that faded sort of way.
White Onesie:

So after all that, now Dallas tells me it looks a little girly. Every design I make ends up looking girly. I’m a girl after all. I thought what could be more boy than a skull and crossbones design on a dead (could be!?) butterfly. I found it online as an old sailor tattoo. Perhaps the next round I’ll do it with black ink on a olive onesie, or red ink on a little black t-shirt. Thoughts? Anyone? How can I make it look tough and boy and rock star?
Â
Saturday, August 30th, 2008
Just completed my very first screen printing project! Wahoo! Dallas was a good helper and looked super cute in his little art apron and gloves. Â

The guy at the art store told me I could get the screen filler out just by using a soft bristled brush and regular dishwashing soap – Wrong! I scrub and scrub to no avail. Looks like I’ll have to go buy some actual screen filler remover liquid.
It seems like such a waste to clear the screen and make a new design, but how many chicks do i really need?Â
The design was something I saw on a stamp that I altered slightly. Perhaps its a bit girlish, but I liked it, so now the kid has got to wear it.Â
Â
Now I just have to let the paint dry completely, then heat set the design with an iron. I think it will be nerve wracking the first time I wash the garment, but no more so than the first time I have to wash the kid.Â
Friday, August 29th, 2008
I decided to learn how to do basic screen printing, primarily in order to make the baby some cute little shirts and onesies. After spending the better part of a day learning what I could from art store sites and how-to videos on You Tube, I decided against getting involved with the photo emulsion technique, at least for now. The designs I have in mind will be pretty straight forward and I think it will be more fun to just paint them on my screen by hand. I decided to get myself started with a basic fabric screen print kit by Speedball. I have completed the first step which involved washing the screen, now I’m waiting for it to dry. I stopped by American Apparel this morning and picked up a few basic baby items to print. I’ll keep you posted on my progress.Â
 I had it in my head I was going to get more done on this project today, but since I’m so freaking pregnant all I was able muster was opening the box, rinsing the screen, then taking a nap. Tomorrow is a new day!
Sunday, August 24th, 2008
Friday, August 22nd, 2008
The other day I came across a little How-To on making an old t-shirt into a Newborn Gown. So I made Dallas rummage through all of his clothes and pick out something that he was okay with me cutting up and giving new life. The victim, his Tony Hawk long sleeve t.
Here it is in 2002:
(Already a bit faded and stretched out.)

It took me a bit of cutting and taping to get the pattern in working order after I downloaded it. Turns out you need to resize it to fit an 8 1/2 x 11 sheet of paper too. I realized this once I had the pattern all taped together and it was my size! Still even the new smaller version seems quite big for a newborn, but in a couple months I’m sure it will fit just fine. Eventually I plan to cut the bottom off and transform it into a kid sized t-shirt. I think it will have slightly longer life that way.

Â
Finished product:

I think it will be easier to sew things for our baby once I know how big babies and kids actually are. Right now its all a guessing game. (I mean, I’d totally be guessing anyway but at least I’d have him to hold garments up to and see how off I am before committing.) The thing is once he’s here, I won’t have as much time and energy to actually sew anything. Oh well. That’s why they invented stores.
Â


